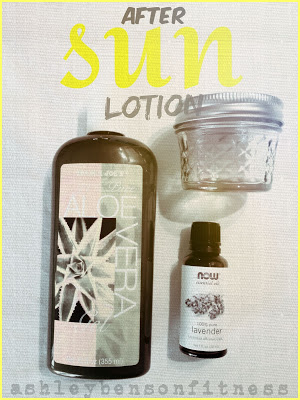
A few years back, a friend of mine gave me a cute little tin can of stuff called Eden Salve from the BULK HERB STORE. At the time I didn’t know what salve was, but it smelled nice and easily fit in my purse. My friend told me I could use it for bug bites, rashes, stings, burns,… ya know, all those fun things that happen to our kids! It didn’t take long for me to realize that this stuff REALLY WORKS and is now my NEW FAVORITE THING! It’s my “ONE PRODUCT I would take if I were stuck on a desert island.” No one has ever asked me to answer this question, but if you did, Eden Salve would most definitely be my answer! Well, the Eden Salve drew me to THE BULK HERB STORE, where I found out how to make PLANTAIN TINCTURE: THE BEST “ITCH CREAM”
Now let me introduce you to a new friend, Kristin Amaro. I recently found out she was making this salve herself and couldn’t help but ask her to write it down for us! So take a few minutes and follow Kristin as she teaches us how easy it is to make our own healing ointment. Oh, and in case you were wondering, she is a talented photographer as well! You should most definitely check out her website!
One more thing before I pass the baton: Kristin has generously donated a large jar of GREEN SALVE for a GIVEAWAY for one of my healthy readers! ENTER TO WIN at the end of this post!
Guest post by: Kristin Amaro
“My garden does not whet the appetite; it satisfies it.
It does not provoke thirst through heedless indulgence,
but slakes it by proffering its natural remedy.
Amid such pleasures as these have I grown old”
~ Epicurus
I have always been a fan of the natural remedy. I do not diminish in any way the value of modern medicine and doctors – I agree there is a place for these things! However, the more I learn and see, the more I realize that so much is available to us right there in our gardens.
Over the past year or so I have been suffering with knee pain – degenerative arthritis/torn meniscus is what I’ve been told. These knee issues (along with the occasional post-workout muscle woes) put me on a quest to find some relief outside of the traditional doctor prescribed treatments & medicines. My search took me to the wonderful world of herbs!
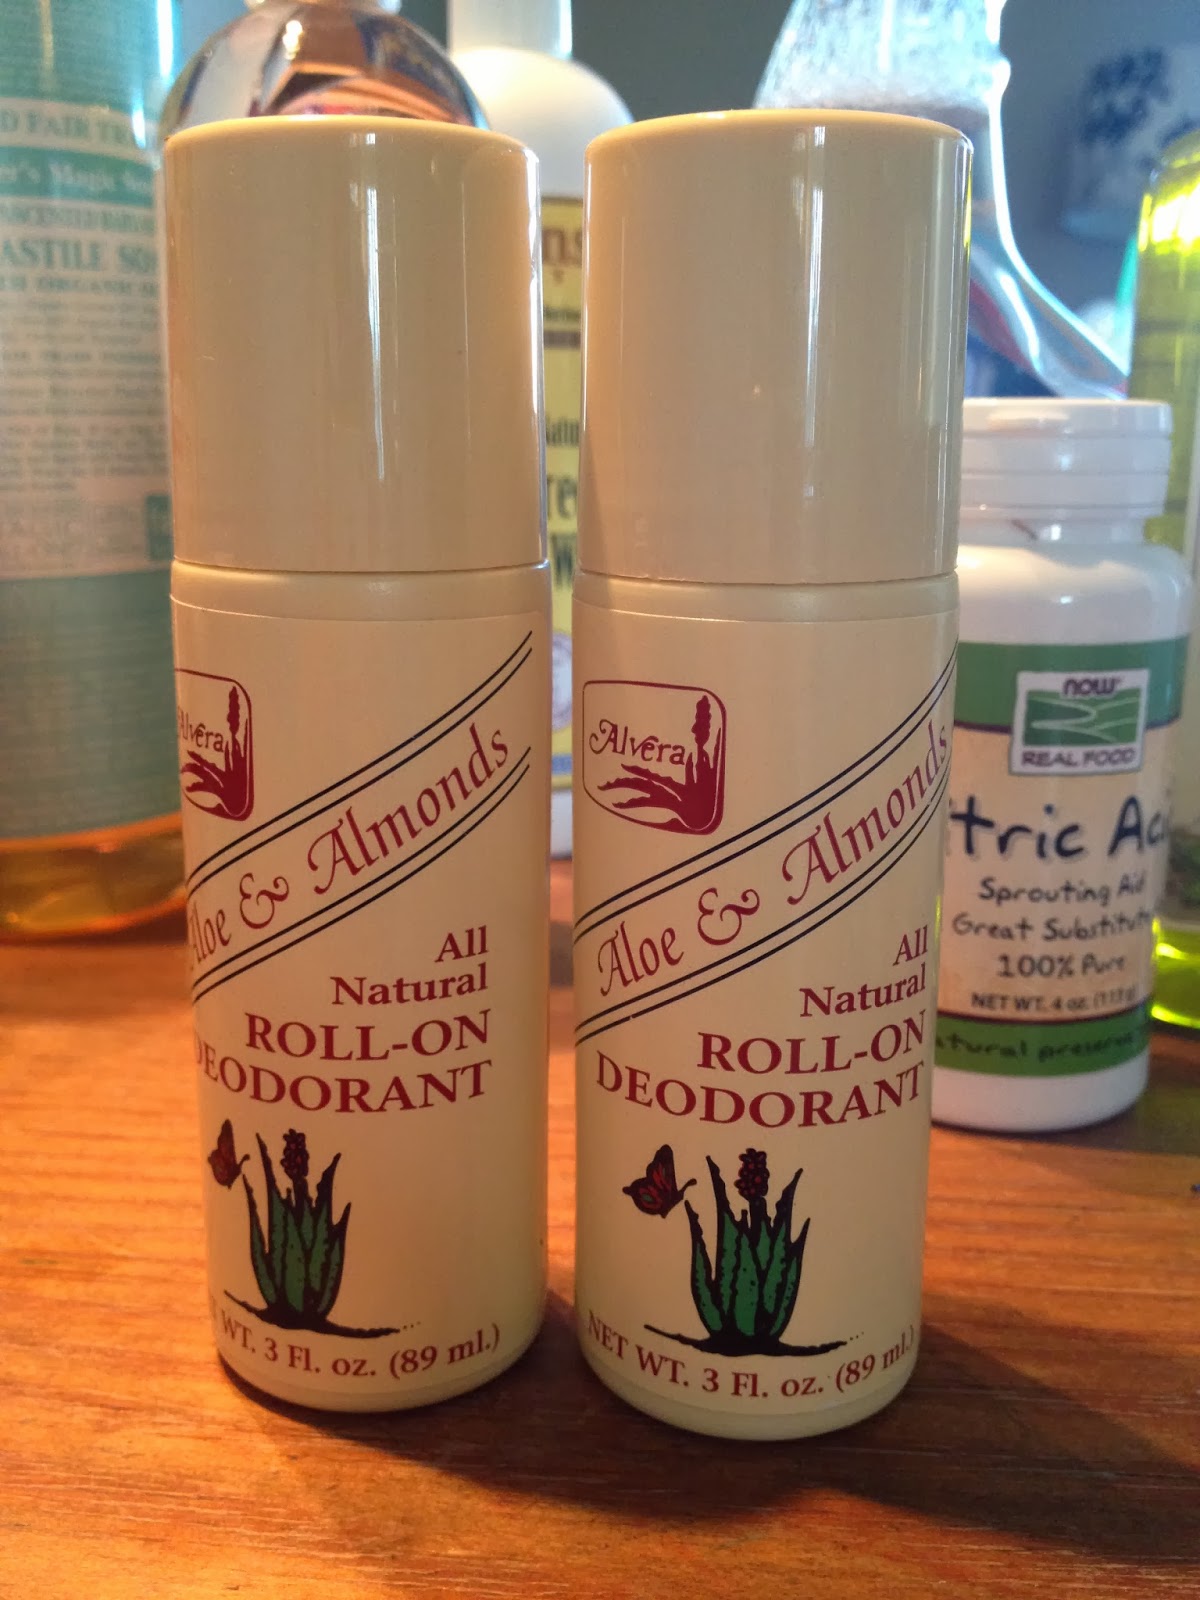
Herbs are not new to me. I have used them for teas, cooking and aromatherapy. One herbal product in particular has made me a true believer in the healing properties of herbs. For over three years I have been a fan of a product called, “Eden Salve” (or “the green stuff” as we sometimes call it). Eden Salve is an organic salve formulated from a number of herbs and other natural ingredients. This stuff……..is………amazing (I could give you many personal testimonials about how this salve has helped me). I have used it on everything from burns to bites, chapped skin to rashes. There are more uses and testimonies on the product’s testimonies page. This product is made and sold by The Bulk Herb Store (BulkHerbStore.com). They also offer a variety of herbs, products and a wealth of information to their site visitors.
So I was on the Bulk Herb Store website recently and came across some herbal “mixes” – one of which was called “Arthritis Salve Mix”. Oh yesssss – that sounds right up my alley!! After further investigation, I found they also offered other herbal mixes (“Muscle Salve Mix” and “Green Salve Mix”).
Hmmm….I wonder if I can put ALL the herbs together in a hot bathtub and just never get out.
It only got better after that. I then found their “Salve Kit” which contains all 3 mixes along with organic beeswax and cute little tin containers. The kit has some cost savings and it would allow me to get my feet wet with salve making!
After seeing all of this, I suddenly had burning within me a very strong desire to be a maker of salve. So I set out to purchase my supplies, gather my tools and turn my kitchen into a salve making factory. I was happy to involve my 10 year old daughter, Abby, in the process. She is the Eden Salve power user of the household so she was eager to see and participate in the process and potentially have an endless supply of Green Salve to use to her heart’s content.
So…..let’s make salve! (All links are located at the bottom of this post to products that are used)
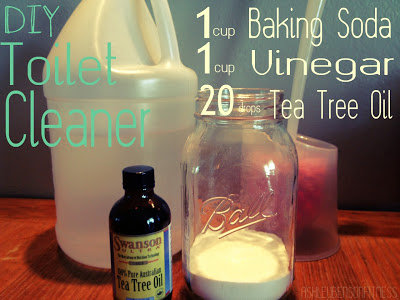
Ingredients & Tools
Before getting started, I got all my tools and ingredients together – let’s take a look at what I used:

- A crock pot and some dishtowels. I know you are super jealous of my old school crock pot.
- Herbs and beeswax (these items were purchased from BulkHerbStore.com as part of their “Salve Kit”).
- Oil (coconut, olive or sweet almond) – I use Tropical Traditions Gold Label Coconut. Anyone who knows me knows that I can’t shut up about this coconut oil. It’s everything within me to not nest a sub-post right here about how fabulous this Coconut Oil is.
- Vitamin E Oil (this acts as a natural preservative). My bottle came from Trader Joe’s.
- A pot (used to warm beeswax and infused oil). You certainly could use your crock pot instead of dirtying up another pot.
- Mason jars with lids (I use the tall 1.5 pint jars) and straining cloth (cheese cloth, cotton sheet or an old t-shirt work for this).
- Something to pour the finished product into. I used the tins that came in the salve kit as well as wide mouth ½ pint mason jars. Although I love mason jars for storing the salve, I would prefer swapping the two piece lids out with one piece lids. I don’t know about you, but I have a special knack for causing the two piece lid to fly apart in different directions when I open it. A problem easily remedied by using one piece lids.
- Here are a few more things that didn’t make it to my photo shoot: a strainer, a chopstick and something to stir with.
The Process
The herbal mixes I received from the Bulk Herb Store Salve Kit have directions on “How to make salve” printed right there on the herbal mix label, as well as on their website. I’m going to go over that process here and show you pictures of how things were looking for me.
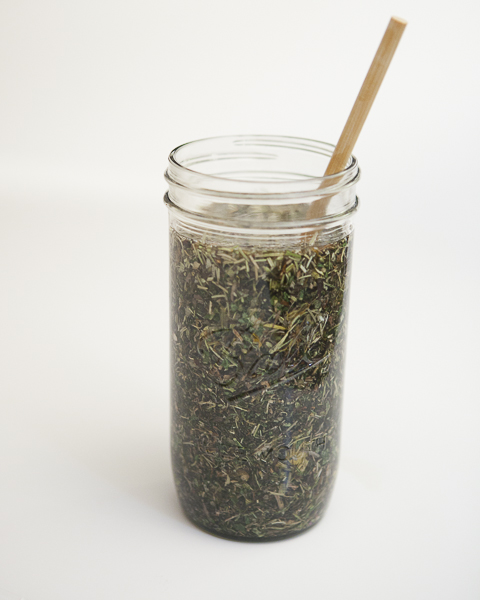
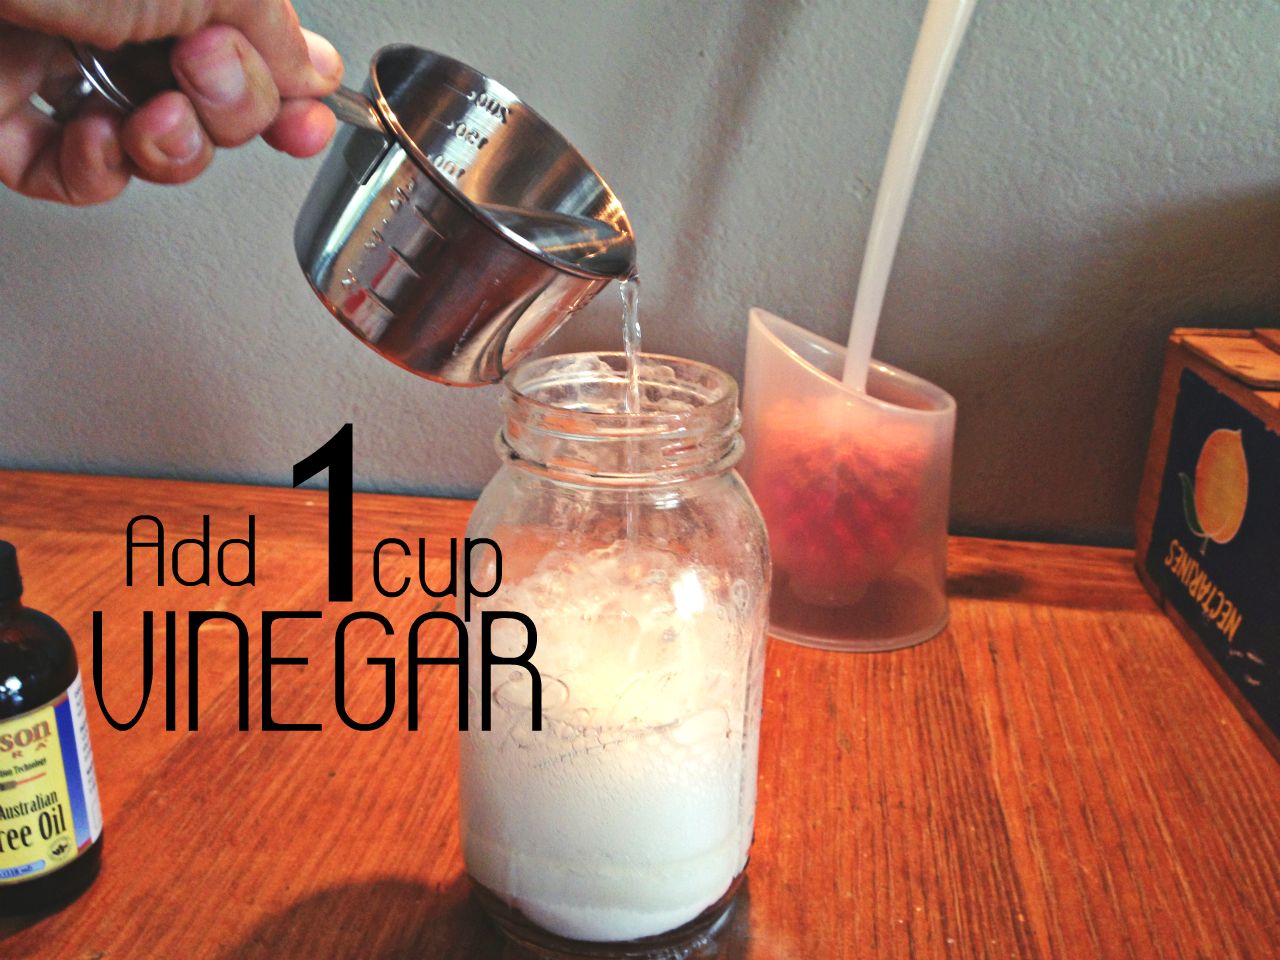
Fill mason jars 2/3 full with herbal mix
Pour your oil over the herbs, leaving about an inch at the top – I gave it a nice little stir with a chopstick. Then I wished that I had some sushi to eat.
Note: For me, the temperature in my house is below 76 degrees so my Coconut Oil is normally in a solid form – this does not make nice for pouring. In order to liquefy it, I placed a bunch of oil in a 32 ounce Pyrex measuring cup and placed that in a pot of hot water on the stove. I put the stove on low heat and let the oil just melt. Then, I was able to pour the oil directly into the Mason jar without any mess. After I poured it all out, I licked the remaining oil from the Pyrex cup. Just kidding. Maybe.
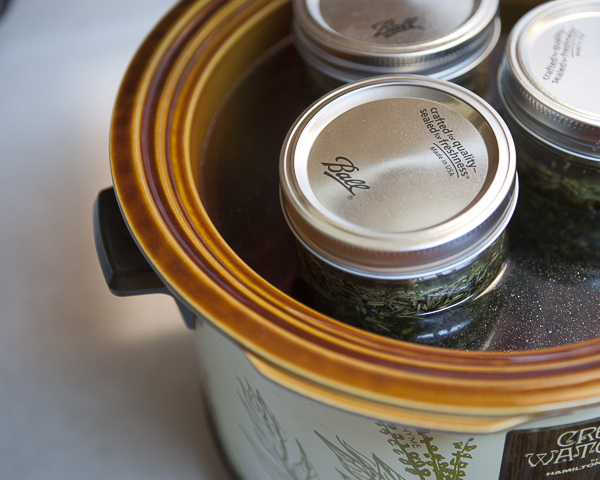
Put a dishtowel at the bottom of the crock pot. The instructions don’t really say why to do this, although I’m assuming it’s so the jars have a nice little barrier between them and the ceramic crock.
Put the lids on the mason jars and set them in the crock pot. Fill with warm water (leave about an inch at the top) and set the crock on low. The instructions indicate that water should be “hot” but not boiling.
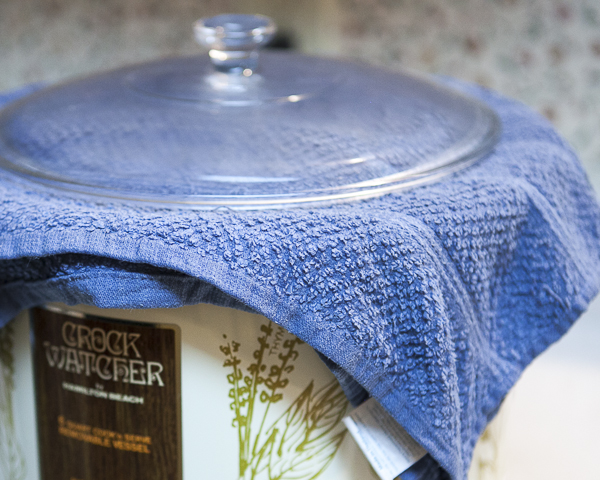
The crock pot lid may not fit over the mason jars, so place a damp towel over the opening to the crock pot and then put the lid on top of the towel. If you are worried that the environment will not stay hot enough, let me reassure you. IT WILL BE HOT ENOUGH!
Be excited!! The oil is in a happy infusing environment….the salve is going to start taking shape!
The Waiting
After getting the oil/herb concoction hooked up in the crock pot, it’s time to wait. In order for the oil to become infused with the wonderful properties of the herbal blend, it must stay in the hot water for 3 days. Take note of the start time and add 3 days – mark it down!
During the infusing process, check the crock pot a few times a day and replenish any water that has evaporated (remember water should be about an inch from the top). If a towel is being used to cover the opening, ensure that it is still damp – if not, run it under warm water, give it a squeeze then replace it over the crock along with the lid. During the waiting process your friends may or may not make fun of you for having a towel-covered crock pot sitting on your counter for 3 days. If this should happen, don’t fret….they will come around when you give them a sample of your awesome salve.
The Salve Making Home Stretch
After the 3 days of waiting, the oil is ready to be made into salve. Here comes the fun part!
Carefully remove mason jars from crock pot….use a dishtowel to remove them since they are super hot from being in the water for 3 days! Get your pot, strainer and straining material ready.
 Pour the herbs and oil into the cloth covered strainer. Let it sit until the oil has strained through. While you are waiting, take in the aroma of the infused oil.
Warning….you are either going to really, really like this smell (like me!) or you are going to really, really dislike it. You may also find yourself dreaming of rubbing it on a brisket…. I’m just sayin’
After the oil has strained, give it a nice squeeze – don’t be wimpy, squeeze it good! You want to get every drop you can of this liquid goodness. Take a moment to give yourself a little massage with the oil that’s left on your hands!!
Note: you will need to measure how many ounces of oil you have in order to determine how much beeswax and Vitamin E oil to use in the following steps. To do this, I poured the oil from my pot back into a few of my mason jars and got my reading that way. I first wiped them out to remove left over herb bits. There may be an easier way to do this, but this was how I did it.
 |
| Beeswax Pastilles |
Determine how much beeswax and Vitamin E oil you need. For the beeswax, the instructions on the salve mix suggest 2 to 3 ounces of beeswax per 8 to 9 ounces of oil. Note: my first batch of salve was a bit on the hard side….I used 3 ounces of beeswax per 9 ounces of oil. My second batch, I scaled back the beeswax (2 oz beeswax to 8 oz oil) and found the consistency to be much better for me.
For the Vitamin E oil, use one drop for every ounce of infused oil you have.
 |
| The beeswax have just added to the infused oil |
With the stove on low heat, warm the oil and beeswax until it’s melted. This could also be done in the crock pot to save a pot from getting dirty. I did not want to do this because it meant cleaning out a very hot crock pot. Ain’t nobody got time for that. I opted to just use a new pot instead. Note: once the wax is melted, it looks very much like it did before adding the beeswax. I was very tempted to just throw more beeswax into the pot so it would get “thicker”. Trust the math and stick with the plan.
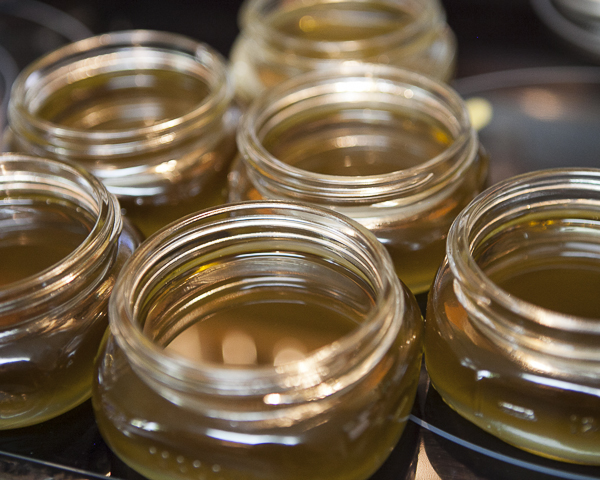
To the melted mixture, stir in the Vitamin E oil (one drop for every ounce of infused oil). Pour the concoction into containers and let cool until the salve is hard. Now, give yourself a pat on the back – we just made some salve!
 |
| A few of my mason jars with freshly made salve – waiting to be cooled! |
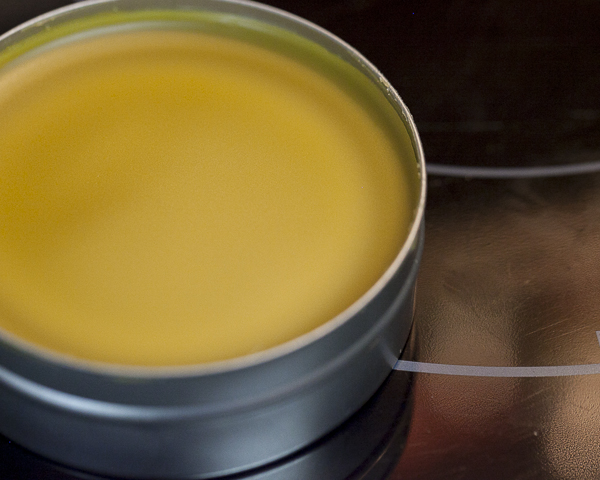
 |
| The salve (in a tin from the Salve Kit), after it’s cooled…. |
The This & That’s

- Be sure and write the name of your salve and date made on your containers….according to the Bulk Herb Store instructions, salve can keep for five years and more.
- Keep your salve out of light and extreme heat
- If you find that your salve is too hard, melt it down and add a bit more oil. If it’s too soft, add a bit more beeswax.
- I love, love, love the smell of the salves! Of course, I had several people strongly dislike the smell. It may be fun to add some essential oils to the mix.
- This may seem random, but when I give the salve to people to use, their first move is to rub their finger pad across the surface in the same way you would if you were going to get some lip gloss from a tin (sorry fellas, just roll with this). How I get my salve is I “scrape” my nail across the surface – away from me – so that the salve ends up on top of my nail. You get more salve this way and you can dig into it cleaner than you would with the pad of your finger.
- The Salve Kit made enough for me to have jars all around the house as well as give to my friends. I still have some of the herb mix left over. I did run out of the beeswax (the Salve Kit comes with 1 pound) during my second production of salve, so I kept a reserve of infused oil to use as a massage oil.
- Share salve with friends and family and let them experience the healing property of herbs!
The Testimony
I have been using the Arthritis and Muscle Salves for almost a month. I am……loving…..them!
 |
| Share with friends! |
The Arthritis Salve
I will confess that I had a bit of an expectation that rubbing this salve on my knees would immediately enable me to do a 3 sets of mountain climbers, lunges and squats followed a time of jumping up and down rejoicing about my new knees.
This ain’t that kind of salve.
However, I will report that when I rub this on my knees, my knees feel better. Do they feel better forever? No. But, they feel better! When I rub it on my knees at night (and I’m talking about a really good rub down with a generous amount of salve) I wake up with knees that feel less stiff.
Not only that, but I feel good about using this because I know the ingredients – and they are all natural.
The Muscle Salve
The first time I used the muscle salve, I had just started feeling the soreness from a 30 minute dumbbell circuit I did earlier in the morning. Since I had not lifted weights in awhile, I knew that I would be super sore. I rubbed the salve on all over my arms and some parts of my legs – I did this a few times over the course of 2 days. After the rub down, I still felt pretty sore. However, I wasn’t as sore as I expected to be. There is no telling if that’s because of the salve, or maybe I didn’t lift as hard. So, I was kind of unsure after that experience.
I had a few more opportunities to rock the Muscle Salve that were very successful. I had the same reaction that I did for the Arthritis Salve. The combination of massage and salve made my muscles feel significantly less sore. Now I don’t have any clue what science is actually going on once I rub the salve in, but according to the Bulk Herb Store website this salve “penetrates the skin, soothes and helps to heal damaged muscles, while reducing inflammation“. All I know is, I felt better. Nobody can argue with that.
The Green Salve
I haven’t had an opportunity to use my Green Salve yet…..the herb recipe for this mix is slightly different from the Eden Salve that’s made and sold by the Bulk Herb Store. However, I would expect for it to work in much the same way.
The Links
The Bulk Herb Store– Buy your complete Salve Kit here.
Eden Salve
Swanson Health Products Essential Oils
Tropical Traditions Gold Label Coconut
Thanks for joining me on this journey of Salve Making!
______________________________________________________________________________
Kristin Amaro is a wife and mom living in the great state of Tennessee (a transplant from the great state of California). Her days are full of many blessings which include home-school teacher for her daughter, photographer & designer for afH Capture+Design, Database Analyst for the International Christian Embassy Jerusalem, artist for Doodle Noshings and serving in her church as a leader in Celebrate Recovery. Oh yes, she is also a maker of salves.
All photos are copyright 2013 Kristin Amaro for afH Capture+Design and may not be used without permission
GIVEAWAY TIME!
Thank you Kristin for this awesome tutorial and for donating a large jar of Green Salve for one healthy reader to WIN in this GiveAway! My family and I can testify that this stuff works!
Official Contest Rules:
You must be 18 years or older and live within the United States to enter. The winner will be chosen randomly and announced on this blog on 9-18 and will then be notified by email. The winner must respond within 48 hours of winning or another winner will be selected.
a Rafflecopter giveawaya Rafflecopter giveaway
Giveaway Terms & Conditions
Promotions are in no way sponsored, endorsed or administered by, or associated with, Facebook or Twitter. It is not sponsored, endorsed, or administered by Bulk Herb Store, Tropical Traditions, or Swansons Vitamins. Giveaway open to US Only unless otherwise noted. Must be 18 years old or older.One winner will be selected in a random drawing from among all eligible entries. Winner will be notified by email. The winner will then have 48 hours to respond or another winner will be selected.
Odds of winning will depend upon the number of eligible entries received. The use of multiple email addresses, Twitter handles, or Facebook Profiles is not permitted and will result in disqualification.
GENERAL RULES:
Prize will only be shipped within the 50 United States unless it is an electronic prize and then it will be given via email. All federal, state and local taxes, insurance, licensing, registration and title fees are the sole responsibility of the winner. No substitution or transfer of prize permitted by winner. Blogs participating and sponsor reserve the right to substitute items/prize of equal or greater value.
AshleyBensonFitness.com is not responsible for incomplete, lost, late, damaged, illegible or misdirected e-mail or for any technical problems, malfunctions of any telephone lines, computer systems, servers, providers, hardware/software, lost or unavailable network connections or failed, incomplete, garbled or delayed computer transmission or any combination thereof. AshleyBensonFitness is not responsible for any damage to any participant’s computer system/software related to or resulting from participation or downloading any materials in this promotion.
By participating in this promotion, entrants agree to be bound by the Official Rules and the decisions of the judges. By accepting prize, winner agrees to hold the AshleyBensonFitness harmless against any and all claims and liability arising out of use of prize. Winner assumes all liability for any injury or damage caused, or claimed to be caused by participation in this promotion or use or redemption of any prize. AshleyBensonFitness is not responsible for typographical or other error in the printing of the offer, administration of the sweepstakes or in the announcement of the prize.